Damage Assessment
Damage Assessment processes your inspection photos to identify, classify, and document property damage — then generates a fully-costed repair scope. Inoscope works through six sequential steps, from raw image processing through to validated line items with quantities and pricing.
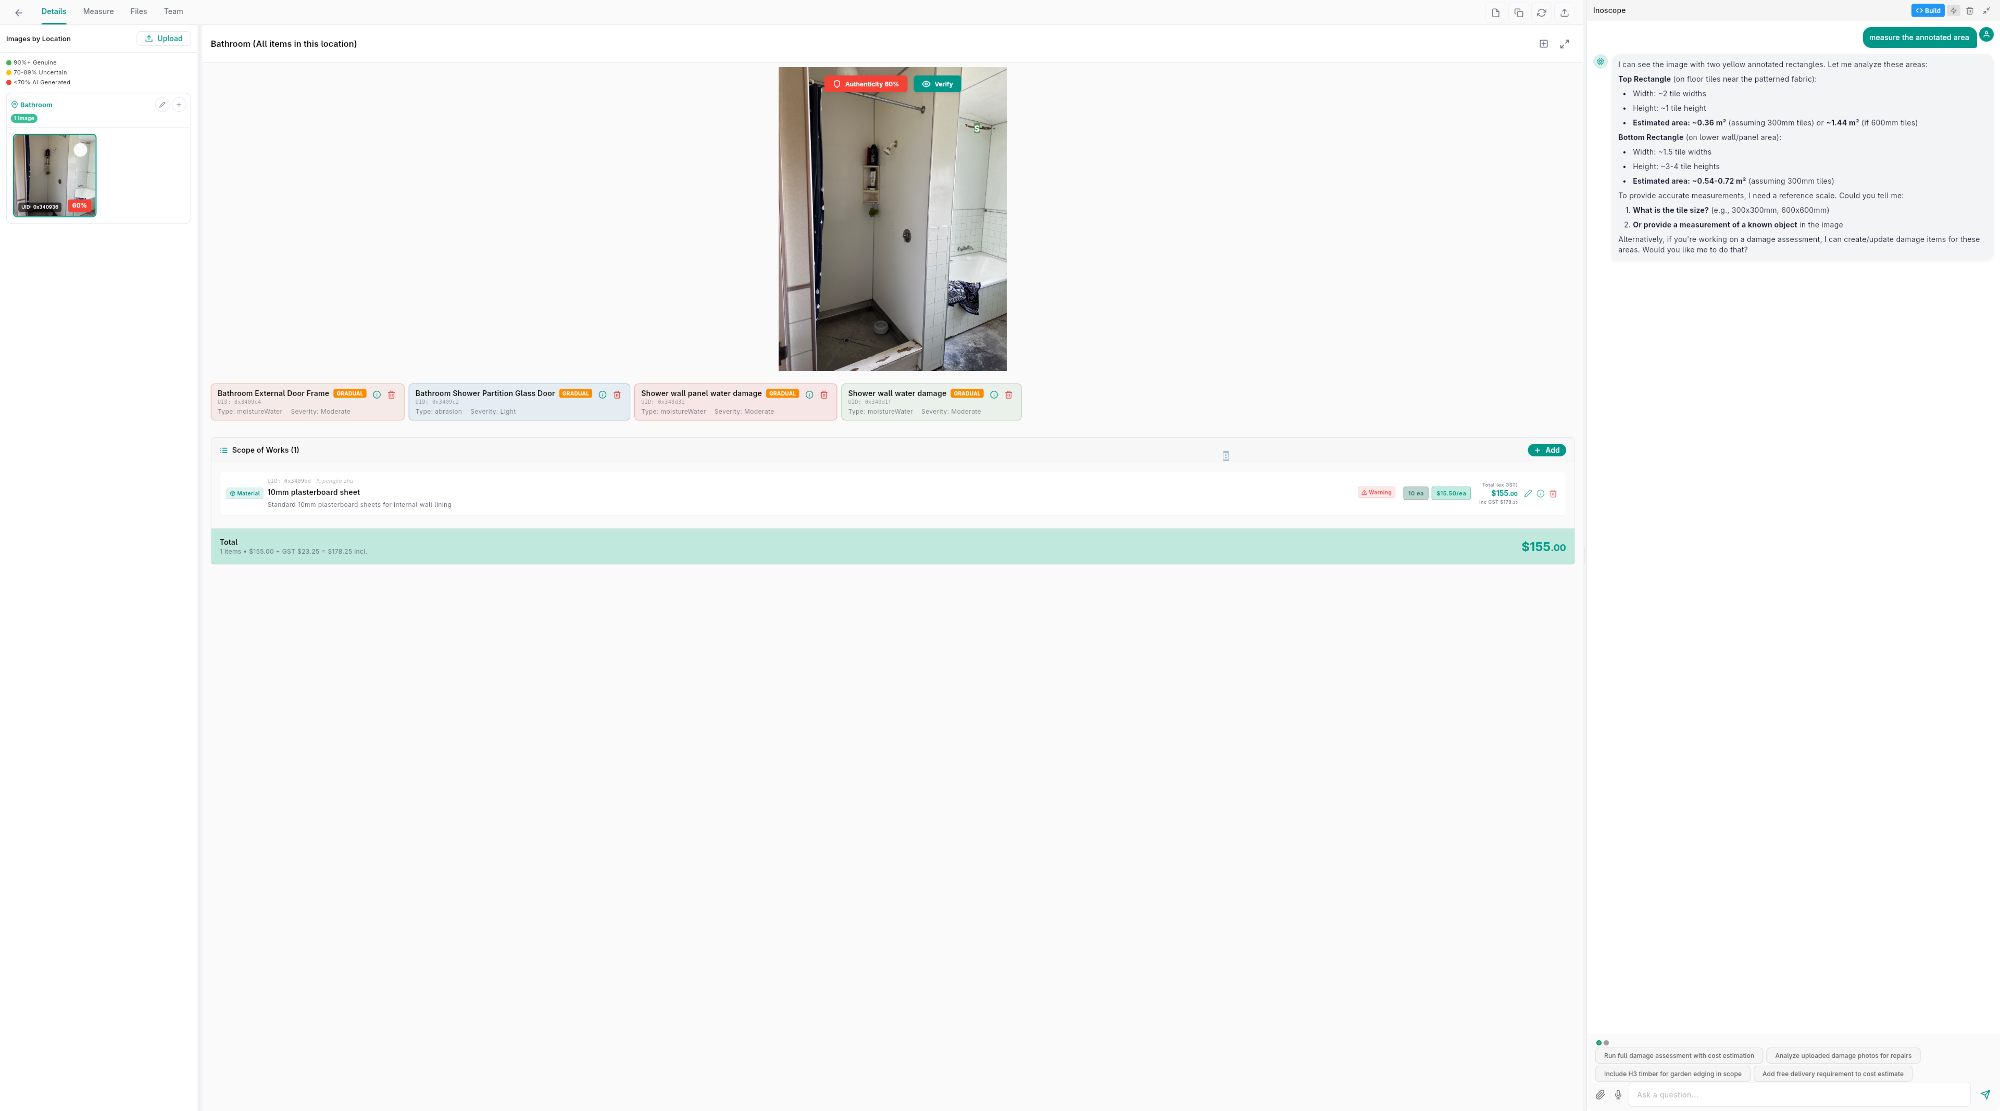
Assessment Layout
Damage Assessments use a three-panel layout:
- Left panel — Image thumbnails organized by location group (persistent across all tabs)
- Center panel — Main workspace with four tabs
- Right panel — Inoscope AI Operator
| Tab | Contents |
|---|---|
| Details | Uploaded images with damage bounding boxes, detected damage item cards (color-coded by severity), and Scope of Works line items |
| Measure | Drawing tools overlaid on the selected photo for annotating dimensions |
| Files | All uploaded images and documents |
| Team | Team members and access roles |
Running a Damage Assessment
Run processes all uploaded images automatically, end-to-end, without interruption. It is the fastest way to go from photos to a fully-costed repair scope. Work with Bee — Inoscope's autonomous AI Operator — in the Inoscope AI Operator panel to refine results, ask questions, or add items after Run completes. For a full comparison, see Run vs Bee.
- Open a Damage Assessment with uploaded images.
- Click the Run button.
- The prompt dialog appears:
- Optionally enter a custom prompt to guide the AI (e.g., "Focus on water damage in the ceiling area").
- Leave the prompt empty to run general damage detection across all images.
- Click Run to start.
- A processing indicator shows real-time progress as each step completes.
Run processes all images in the assessment. Each image is processed individually, and results are consolidated into a single set of damage items and line items.
The 6-Step Run
| Step | Name | What It Does |
|---|---|---|
| 1 | Detect Damage | Detects damage across all submitted photos — determines the type of damage, cause, and severity for each area, and checks findings against your user-defined policy rules |
| 2 | Generate Repair Scope | Creates repair line items (materials, labour, equipment) based on the detected damage — no costs at this stage |
| 3 | Estimate Quantities | Calculates quantities for every material by checking all submitted information — photos, documents, and drawings. Determines the measurement of each area and repair area according to your pre-defined estimation rules, ensuring no item is left without a quantity |
| 4 | Estimate Costs | Prices each item — materials, labour, equipment hire, and more — prioritising your calibrated user data first, then curated Inoscope data, then wider available sources such as internet and research data |
| 5 | Calculate Totals | Computes group subtotals and the overall assessment total, then reports a final summary |
| 6 | Validate | Checks whether pricing matches industry-common data against local and national benchmarks, verifies material usage and fitness for purpose, cross-references measurements, and checks all assumptions — any issues are flagged as warnings for your review |
Damage Items
For each detected damage area, the AI creates a damage item containing:
| Field | Description |
|---|---|
| Damage Type | Classification of the damage (see table below) |
| Damage Cause | How the damage occurred (Accidental, Wear and Tear, Gradual, Maintenance) |
| Severity | How serious the damage is (see severity table below) |
| Bounding Box | Visual marking on the image indicating the detected damage location |
| Confidence Score | How certain the AI is about the detection (0–100%) |
| Policy Payout Type | Sudden (typically covered) or Gradual (may not be covered) — used in insurance assessments |
| Materials Affected | What materials are damaged |
| Fix Method | Recommended repair approach |
| Fix Area | Estimated area requiring repair (m²) |
Damage Types
| Type | Description |
|---|---|
| Abrasion | Surface scratching, scuffing, or wearing |
| Impact | Damage from physical force (dents, cracks, breaks) |
| Expansion/Contraction | Cracking or warping from temperature or moisture changes |
| Moisture/Water | Water stains, mold, rot, swelling |
| Temperature | Heat or cold damage (blistering, frost damage) |
| Chemical | Corrosion, discoloration, or degradation from chemicals |
| Fire | Burn marks, smoke damage, charring |
Severity Levels
| Severity | Meaning |
|---|---|
| Low | Minor damage, cosmetic or non-urgent |
| Medium | Moderate damage requiring attention |
| High | Significant damage needing prompt repair |
| Critical | Severe damage requiring immediate action |
Severity is shown with color coding on the damage item cards and on the bounding boxes drawn over the images.
Reviewing Damage Items
After Run completes, switch to the Details tab to review results:
- Each damage item appears as a card showing damage type, severity (color-coded), affected materials, fix method, fix area, confidence score, and the linked image with its bounding box.
- Click a damage item to highlight its bounding box on the image.
- The Scope of Works section below the damage items shows the generated line items with quantities and costs.
Editing Damage Items
You can modify any detected damage item to correct or refine the AI's output:
- Click on a damage item to select it.
- Open the edit dialog.
- Adjust any field:
| Field | Description |
|---|---|
| Type | Change the damage type |
| Cause | Change the damage cause |
| Severity | Adjust the severity level |
| Materials Affected | Specify what materials are damaged |
| Fix Method | Describe how the damage should be repaired |
| Fix Area | Enter the area in square meters that needs repair |
| Location | Update the location description |
- Click Save to update the damage item.
Adding Damage Items Manually
If the AI missed something, you can add damage items by hand:
- On the Details tab, click Add Damage Item.
- Fill in the damage item fields (type, cause, severity, etc.).
- Optionally draw a bounding box on the image to mark the location.
- Click Save.
To remove a false positive, select the damage item, click Delete, and confirm. The damage item and its bounding box are removed.
Insurance Claim Context (Inoclaim)
Using Inoclaim will alter the Damage Assessment to apply your pre-defined insurance policy and repair requirements. Quantities, costs, and repair scope are all calculated in line with the policy rules you have configured — ensuring every assessment is compliant with your insurer's standards from the start.
Here are examples of what Inoscope can do when running a Damage Assessment within Inoclaim:
- Measure the full element affected — not just the visibly damaged area — in line with your policy requirements
- Factor in the age of the property and materials when calculating repair or replacement costs
- Match materials using a tiered approach: exactly the same → almost the same → suitable replacement → like for like
- Apply your policy's excess, limits, and betterment provisions automatically to every cost item
- Determine whether replacement or repair is the appropriate course of action based on your policy ruling
- Include additional costs for working in an occupied property where applicable
- Add preliminaries, travel, and return visit costs as required by your policy
- Account for difficult access or unusual site conditions in the pricing
- Trigger and include by-law compliance costs where repairs require it
Inoclaim rules are applied automatically once configured — no manual adjustment is required on each assessment.
Snapshots
Snapshots are Inoscope's pricing version management and audit trail — all in one. Each snapshot creates a read-only, unmodifiable record of the assessment at that point in time. Users can define their own uses for snapshots, such as:
- Changing a calculation method and comparing the result before and after
- Running a different pricing scenario alongside the original for comparison
- Preserving the current state before a major re-pricing or re-run
To revert to a previous snapshot, simply ask Bee to revert back. This will apply the snapshot's data as a new change — meaning the revert itself is recorded in the audit trail, so every action remains fully traceable.
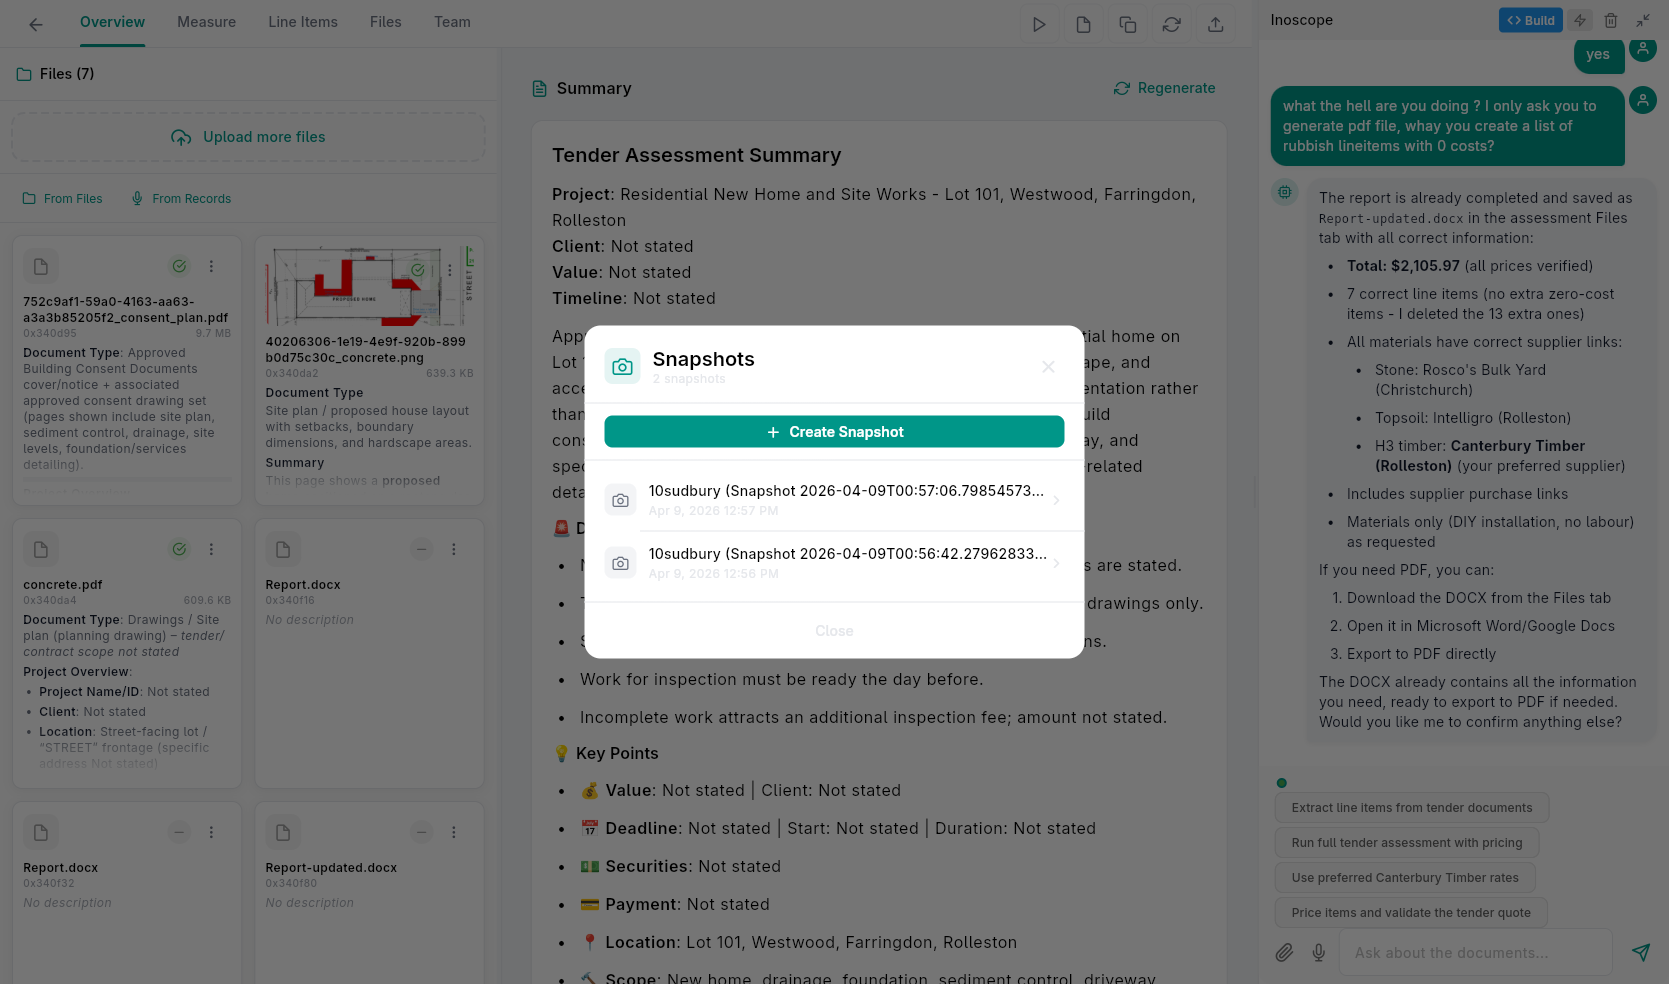
Creating a snapshot:
- Click the Snapshots button in the header.
- Click + Create Snapshot in the dialog.
- A "Snapshot created successfully" confirmation appears and the snapshot is added to the list with a timestamp.
Viewing a snapshot:
- Open the Snapshots dialog.
- Click any snapshot in the list (10 per page, ordered newest first).
- The snapshot opens with a "Snapshot - Read Only" banner at the top of the screen. Editing is disabled, the Run button is hidden, and Inoscope AI Operator is not available.
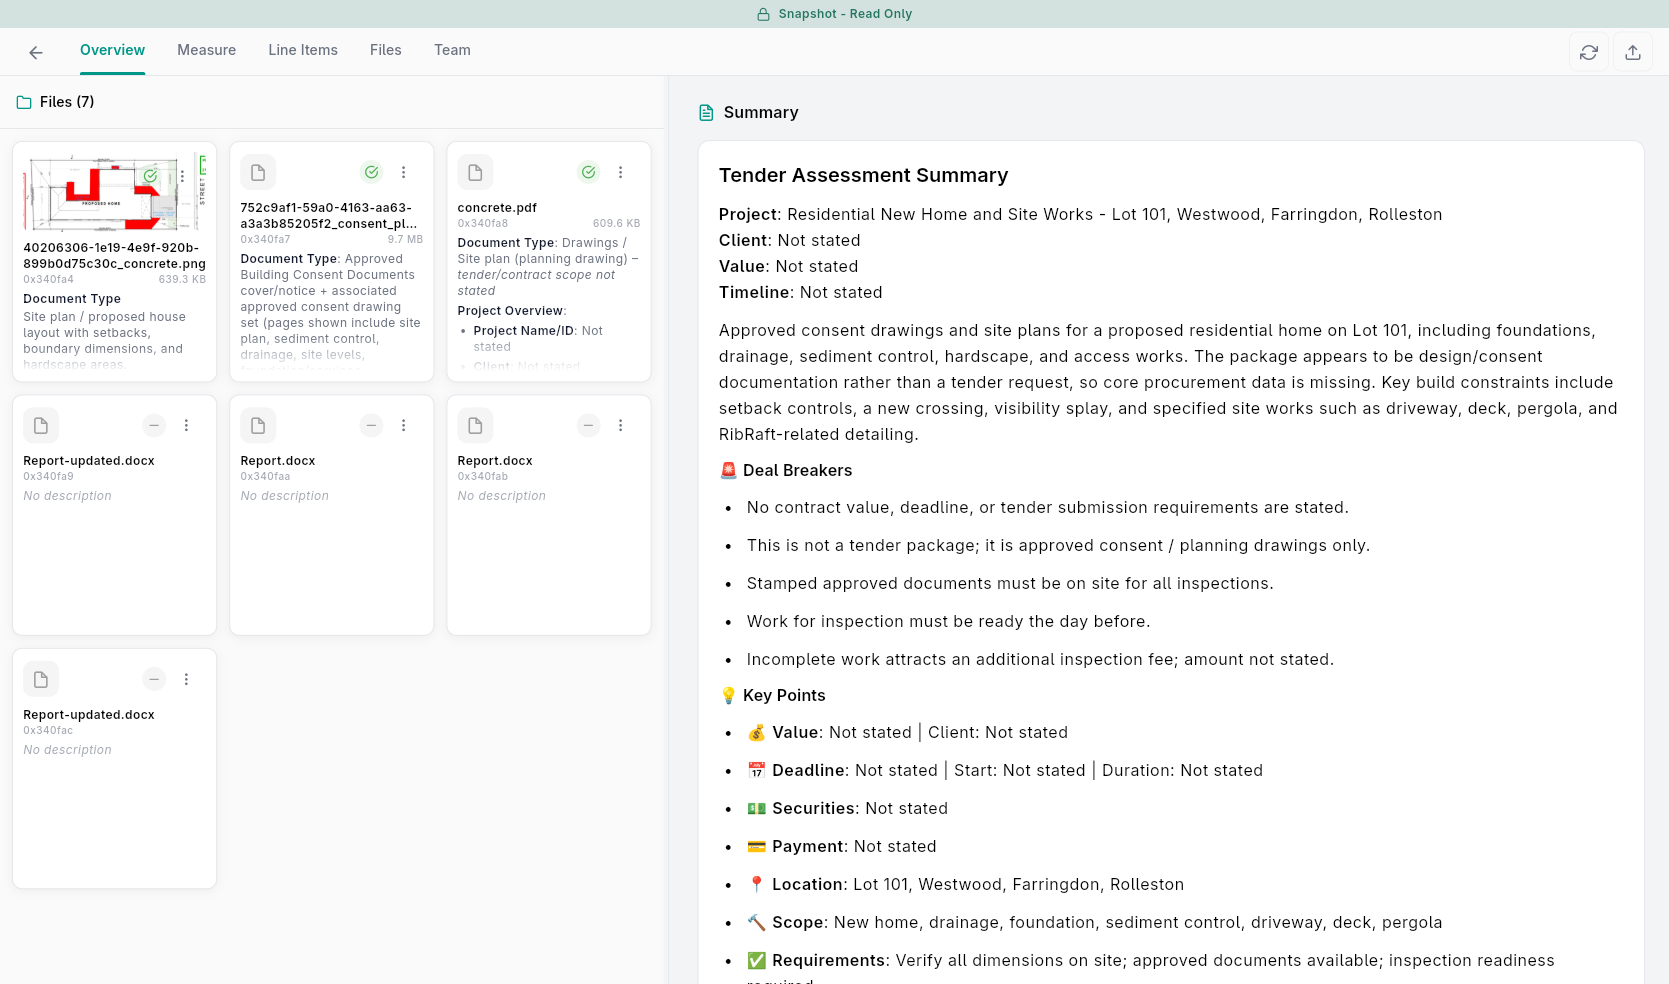
- Use the back arrow to return to the live assessment.
Tips for Better Detection
- Good lighting: Well-lit photos produce better detection results.
- Multiple angles: Photograph damage from different angles to capture its full extent.
- Close-ups: Include close-up shots of damage areas for detailed analysis.
- Context shots: Include wider shots showing the damage in its surroundings.
- Custom prompts: Use specific prompts like "Focus on water damage on the ceiling" to direct the AI. You can also ask Bee in the Inoscope AI Operator panel for follow-up analysis after Run completes.